Sunday, July 22, 2012
day 21: channels and some bull
toro photoshop painting from Maryn Roos on Vimeo.
It's tutorial Sunday! And since yesterday's toucan video worked out so well I decided to make another. I have to paint these icons for work anyway, so may as well record it.
This is mostly about Channels. When I first learned how to use them, it was the best thing I'd ever learned in Photoshop. It's still useful even though I don't scan in my drawings anymore.
To better understand what Channels are, think of them like a silk screen. Where there is black, no paint can get through. Where it's white, you get full color. Shades of gray equal the amount of transparency, so 50% gray means 50% of your color bleeds through.
Here is a pencil drawing of a bull. I actually found a pencil! Couldn't find a pencil sharpener though so had to use a pocket knife.
Once the drawing is scanned, I first make the drawing grayscale by opening the Hue/Saturation dialog box: Image>Adjustments>Hue/Saturation... or cmd+U. I then slide the saturation bar all the way to gray. Next I open the Levels box: Image>Adjustments>Levels... or cmd+L. I adjust the sliders until I get a decent black line.
Next, I click on the Channels tab. It is up by Layers tab. I click on the dotted circle at the bottom of the Channels palette. This selects the WHITE area.
Next I go back to the Layers tab. I create a new layer then invert the selection: cmd+Shift+I. Now the drawing is selected rather than the space around it. I pick a color (I'm using black) and fill the selection: alt+delete. And finally I turn on the Preserve Transparency button. That is the first box at the top of the layers palette after the word Lock. With this on, I can paint where ever I like, but if a pixel is 100% transparent it will stay 100% transparent, 50% transparent stays 50% transparent. It is a great way to color your lines. I've turned off the scanned drawing layer so you can see the pencil drawing is now on a transparent background.
That was basically the tutorial. The rest is just to show you the steps you see in the video. Here the bull is still in three layers. Two layers of color and the line layer, all with Preserve transparency on for easy coloring. To fill in the area of the bull, I selected outside the bull lines, then expanded the selection by 2 pixels, then inverted the selection, then alt+del on a new layer to fill it in. It's not perfect, but faster than using the lasso tool around all the edges or painting it in with a brush.
Here is with the lines colored. Maybe not the best example since it's mostly dark so it doesn't look that different from the black lines. Once the lines are colored, I merge the layers and start adding the details.
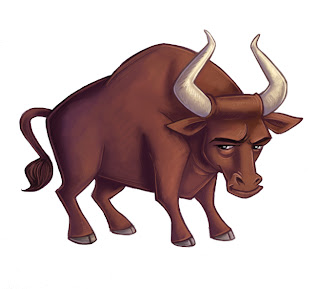
Lines and color cleaned up. It's essentially done.
But I wanted to add a little texture and a little more color. The quickest way to do that was to command+click the layer thumbnail to select the bull and then make a new layer. I can shade and add texture without going outside the edges. The reason I didn't put it on the same layer as the bull was so I could adjust the layer properties: change the opacity, set it to Overlay or Soft Light, etc. Sometimes I do some of the painting on a new layer because I'm not sure what I'm doing. If the experiment fails I don't have to revert or undo, I just delete the layer.
So that was a quick painting of a bull in Photoshop. I don't spend too much time on these little icons since they are meant to be about an inch tall on a monitor. Let me know if you have questions about Channels or anything else I mentioned. Happy to clarify and answer!
Labels:
30 day challenge,
photoshop,
step-by-step,
video
Subscribe to:
Post Comments (Atom)


1 comment:
Fantastic tutorial...You make it sound so easy..Oh, for the expertise of the Baroness! I couldn't view the video, guess my server didn't like something about the video portion. Look forward to tomorrow's post. Love ya, Mom
Post a Comment